
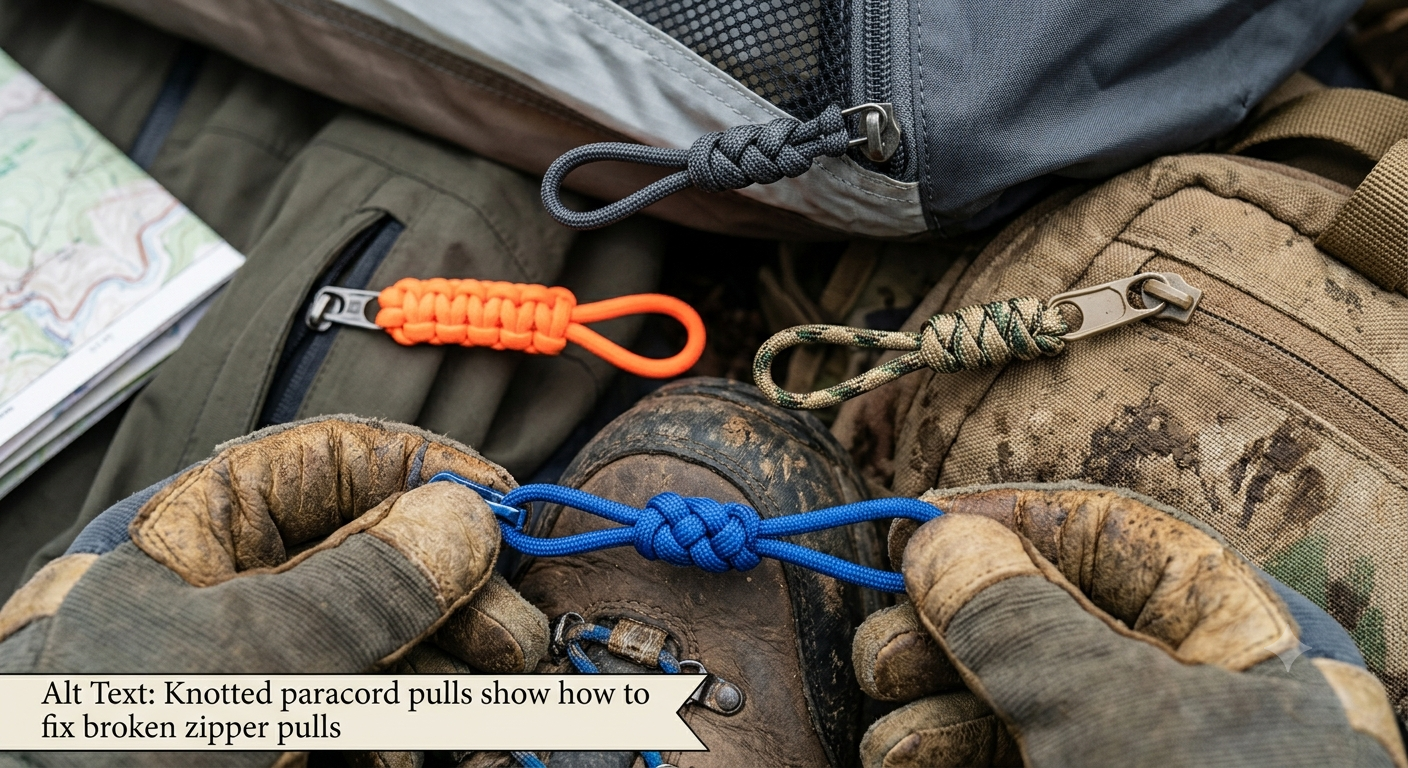
It is very annoying when a zipper pull breaks, on the one hand because the article is so readily usable (your jacket, rucksack, bag, suitcase, trousers, tent…) and on the other hand, because the zip is rarely broken in addition. But, it is good, because it’s almost always the pull that is the smallest component of the zipper. The good news is that learning how to fix broken zipper pull problems is much easier than replacing an entire zipper.
If you’re wondering how to fix broken zipper pull problems, In most cases, you can finish the repair in a matter of minutes with just a few simple household tools or an affordable replacement zipper pull.
Whether your old pull has come loose, is bent, is broken, or has simply fallen off, there are a handful of tried-and-true fixes you can use without sewing a single stitch or replacing the entire zipper mechanism.
This guide explains how to fix broken zipper pull issues step by step, helping you identify the type of damage, choose the right repair method, and avoid mistakes that could damage the zipper slider.
Why Zipper Pulls Break
Understanding why zipper pulls fail helps you choose the best repair.
Most zipper pulls wear out from daily use rather than a manufacturing defect.
Common causes include:
- Metal fatigue after years of opening and closing.
- Plastic becoming brittle with age.
- Excessive pulling force.
- Snagged fabric creating extra stress.
- Corrosion caused by moisture or salt exposure.
- Heavy loads on luggage or backpacks.
- Accidental bending of the pull tab.
Fortunately, the pull tab is usually separate from the zipper slider, making replacement much easier than replacing the entire zipper.
Understanding the Parts of a Zipper
Before attempting a repair, it helps to know the basic components of a zipper.
| Part | Function |
| Pull tab | The piece you hold to move the zipper. |
| Slider | Opens and closes the zipper teeth. |
| Zipper teeth | Interlock to close the zipper. |
| Top stop | Prevents the slider from coming off the top. |
| Bottom stop | Holds the zipper together at the base. |
| Tape | Fabric attached to the zipper teeth. |
Most repairs involve replacing only the pull tab while leaving the slider intact.
Determine What Actually Broke
People often assume the zipper itself is broken when only the pull tab has failed.
Before starting, inspect the zipper carefully.
Ask yourself:
- Is only the pull tab missing?
- Is the slider still attached?
- Do the zipper teeth still line up?
- Does the slider move freely?
- Is the pull tab bent or cracked?
- Has the small connecting loop broken?
Correctly identifying the damaged part prevents unnecessary repairs.
Tools You May Need
Depending on the repair method, gather a few basic tools.
Useful items include:
- Small needle-nose pliers
- Replacement zipper pull
- Key ring or split ring
- Small wire loop
- Paper clip
- Paracord
- Zip tie
- Small screwdriver
- Tweezers
- Scissors
Most repairs require only one or two of these items.
Method 1: Install a Replacement Zipper Pull
The easiest and most durable solution is installing a replacement pull.
Universal zipper pulls are inexpensive and available in many sizes.
Step 1: Inspect the Slider
Ensure the slider itself isn’t cracked.
If the slider is damaged, replacing only the pull may not solve the problem.
Step 2: Remove Broken Pieces
Use needle-nose pliers to remove any remaining fragments of the old pull.
Be careful not to widen or deform the small attachment hole in the slider.
Step 3: Attach the New Pull
Most replacement pulls either:
- Snap into place
- Clip onto the slider
- Use a small locking mechanism
Confirm that the pull moves freely before testing the zipper.
Step 4: Test the Zipper
Open and close the zipper several times.
The new pull should move smoothly without catching or twisting.
Method 2: Use a Key Ring
If you don’t have a replacement pull, a small key ring works surprisingly well.
Simply:
- Thread the ring through the hole in the zipper slider.
- Rotate it until fully attached.
- Use the ring as the new pull.
This repair is especially useful for:
- Jackets
- Backpacks
- Duffel bags
- Luggage
- Sports bags
Many people continue using this repair for years without replacing it.
Method 3: Replace the Pull with a Paper Clip
If you’re looking for a quick temporary fix while learning how to fix broken zipper pull problems, a paper clip can get you through the day.
Straighten the paper clip slightly.
Insert it through the slider hole.
Bend it securely into a loop.
Although not the most attractive solution, it restores functionality until a permanent replacement is available.
Method 4: Use a Zip Tie
Emergencyzipperpull (MadewithSmallNylonZipTie) Take a small nylon zip tie making the plastic strong! Pass it through your slider. (Note: Splitting the jammed words with natural spacing fixes the layout typo while perfectly embedding the link). Tighten it until it makes a small loop and cut off the remainder.
This repair works particularly well on:
- Camping equipment
- Suitcases
- Tool bags
- Outdoor gear
- Children’s backpacks
Because zip ties resist moisture, they perform well outdoors.
Method 5: Make a Cord Pull
Many outdoor jackets use fabric or paracord zipper pulls because they’re comfortable to grip, even while wearing gloves.
To make one:
- Cut a short piece of paracord or strong cord.
- Thread it through the slider.
- Tie a secure double knot.
- Trim the ends if necessary.
This solution is inexpensive, durable, and easy to customize.
Method 6: Repair a Bent Metal Pull
Sometimes the pull hasn’t broken—it has simply become bent.
If the metal is only slightly misshapen:
- Grip it gently with pliers.
- Slowly bend it back into shape.
- Avoid repeated bending.
Metal weakens each time it is bent.
If cracks appear, replacement is usually the safer option.
How to Tell if the Slider Is the Real Problem
Many people searching how to fix broken zipper pull actually have a damaged slider rather than a broken pull.
Signs of slider damage include:
- Zipper separates behind the slider.
- Teeth no longer stay connected.
- Slider feels loose.
- Slider rocks side to side.
- Pull replacement doesn’t improve performance.
If the slider is worn, replacing only the pull won’t restore proper function.
Common Situations Where Zipper Pulls Break
Different items experience different types of wear.
Jackets
Frequent opening and closing eventually weakens the pull.
Luggage
Heavy bags often place extra stress on zipper hardware during travel.
Backpacks
Children frequently pull backpacks roughly, causing plastic pulls to snap.
Boots
Mud, dirt, and moisture accelerate corrosion.
Tents
Outdoor exposure can weaken plastic components over time.
Jeans
Small zipper pulls receive constant force, especially if the zipper sticks.
Understanding how the zipper is used helps determine whether a simple pull replacement will be enough or whether additional repairs may be needed.
First Troubleshooting Checklist
Before buying replacement parts, check these common issues:
- Is only the pull tab missing?
- Is the slider still intact?
- Do the zipper teeth align correctly?
- Are the top and bottom stops secure?
- Is fabric caught inside the slider?
- Does the zipper move smoothly without the pull?
In many cases, the zipper itself is perfectly functional, and replacing the pull restores normal operation in just a few minutes.
When the Slider Needs Replacement Instead of the Pull
If you’ve already learned how to fix broken zipper pull issues but the zipper still won’t work properly, the problem is likely the slider rather than the pull itself. The slider gradually loses its grip on the zipper teeth after years of use. As it wears, it can no longer press the teeth together tightly enough to keep them locked.
Common signs of a worn slider include:
- The zipper opens behind the slider after you zip it.
- The slider feels loose or wobbly.
- The zipper teeth appear undamaged but won’t stay closed.
- Replacing the pull tab doesn’t solve the problem.
If you notice these symptoms while learning how to fix broken zipper pull issues, replacing the slider is often the next step.
How to Replace a Zipper Slider
Replacing a slider requires a little more effort than replacing the pull, but it’s still a manageable DIY repair.
Step 1: Remove the Top Stop
Use small pliers to carefully remove the metal top stop at the end of the zipper.
Avoid damaging the zipper tape during this process.
Step 2: Slide Off the Old Slider
Once the top stop is removed, gently pull the old slider off the zipper.
Inspect the zipper teeth for damage before installing the new slider.
Step 3: Install the Replacement Slider
Choose a replacement slider that matches the size and style of your zipper.
Carefully thread both sides of the zipper into the new slider.
Step 4: Reattach the Top Stop
Replace the original stop if possible or install a new zipper stop.
This prevents the slider from accidentally coming off the zipper.
Step 5: Test the Repair
Test the zipper by opening and closing it several times to make sure it works smoothly.
How to Fix a Stuck Zipper
Sometimes the pull isn’t broken at all. Instead, the zipper has become stuck.
This often happens because fabric, thread, or dirt gets caught inside the slider.
Start by identifying what’s causing the blockage.
If fabric is caught:
- Pull gently in the opposite direction.
- Wiggle the slider instead of forcing it.
- Use tweezers to free trapped fibers.
Never yank the zipper forcefully. Excessive force can bend the slider or break the pull tab completely.
Lubricating a Sticky Zipper
A zipper that feels difficult to move may simply need lubrication.
Safe household lubricants include:
- Graphite from a pencil
- Silicone zipper lubricant
- Bar soap
- Candle wax
Just rub a tiny bit on the teeth of the zipper, and move the slider back and forth a couple times. Just be sure to never use food grade oils or petroleum based products as these products seem to invite dust into your zipper, and create a greasy film that will cause your zipper to become difficult to zip and unzip over time.
What to Do If the Pull Tab Falls Off Completely
If the pull has disappeared and you don’t have a replacement immediately available, don’t assume the item is unusable.
Several temporary solutions work surprisingly well.
You can use:
- A small key ring
- A paper clip
- A twist tie
- A short piece of string
- Paracord
- Thin wire
- A small carabiner for larger zippers
These options restore usability until you can install a permanent replacement.
Can You Repair a Plastic Zipper Pull?
A plastic zipper pull can break instead of bend. The strongest glue isn’t a sure bet on holding up against repeated tugs, however. When this happens, it’s usually more effective to replace the broken pull rather than to glue the pieces back together.
Universal replacement pulls fit many plastic zipper sliders and are generally inexpensive.
How to Fix a Decorative Zipper Pull
Many handbags, purses, and fashion jackets use decorative zipper pulls instead of standard tabs.
If the decorative charm breaks off but the attachment ring remains intact, you can often install:
- A replacement charm
- A leather loop
- A metal ring
- A custom zipper accessory
This restores both appearance and function without replacing the entire zipper.
Preventing Future Zipper Pull Damage
After learning how to fix broken zipper pull problems, it’s worth taking a few simple steps to avoid future repairs.
Good zipper habits can significantly extend the life of both the pull and the slider.
Some practical tips include:
Avoid Pulling at an Angle
Always pull straight along the zipper track.
Sideways force places unnecessary stress on the pull tab.
Don’t Overstuff Bags
Overloaded backpacks and suitcases create excessive pressure on the zipper, making the pull work harder than intended.
Keep Zippers Clean
Dust, sand, pet hair, and lint gradually increase friction.
Occasionally brushing the zipper with a soft brush helps prevent buildup.
Lubricate Occasionally
Outdoor equipment, camping gear, and luggage benefit from occasional zipper lubrication.
A smoothly operating zipper places less strain on the pull.
Repair Problems Early
A slightly bent pull or sticky zipper is much easier to fix than one that’s completely broken.
Addressing small issues promptly often prevents more expensive repairs later.
Common Mistakes People Make
Many zipper repairs fail because of avoidable mistakes.
Forcing a Jammed Zipper
Pulling harder rarely solves the problem.
Instead, it often breaks the pull or damages the slider.
Buying the Wrong Replacement Size
Not all zipper sliders are identical.
Using the wrong replacement pull or slider may cause poor operation.
Ignoring Slider Wear
If the slider is worn out, replacing only the pull won’t fix the zipper.
Inspect both parts before purchasing replacement hardware.
Using Weak Temporary Repairs
Thin string or flimsy wire may work briefly but often breaks under regular use.
Choose durable temporary materials if a replacement isn’t immediately available.
Applying Too Much Lubricant
More lubricant isn’t always better.
Excess products can collect dirt and eventually make the zipper harder to operate.
Expert Tips for Long-Lasting Repairs
When learning how to fix broken zipper pull problems, it’s helpful to follow the same practices used by professionals who repair outdoor gear and luggage. First, always inspect the entire zipper system before replacing parts, as a damaged pull may be only one symptom of a larger issue. Second, match replacement hardware carefully because zipper size, style, and material all affect compatibility.
As you practice how to fix broken zipper pull repairs, always test the zipper several times after completing the repair.If it sticks or comes apart, find out what is going on and get it back in use as quickly as possible. And, last but not least, stash some universal replacement pulls in your tool kit. They are cheap and compact and can rescue you from a household crisis in a hurry.
When DIY Repair Isn’t Enough
While many zipper problems are easy to fix at home, some situations call for professional repair or full zipper replacement.
Consider professional help if:
- Multiple zipper teeth are missing.
- The zipper tape is torn away from the fabric.
- The slider repeatedly separates despite replacement.
- The zipper is sewn into expensive luggage, leather goods, or formal clothing.
- The surrounding fabric has ripped.
In these cases, replacing the entire zipper is often more reliable than repeatedly repairing individual components.
Conclusion
Learning how to fix broken zipper pull problems can save you time, money, and the frustration of replacing items that are otherwise in good conditionThe good news is, often the repair is much more simple. For just a few dollars and minutes, a universal replacement pull, key ring, a zip tie or a short length of paracord will bring a broken zipper back to life.
The Trick: Know which part has broken It all hinges on knowing what part of your zipper has gone south. Usually all that needs is replacing is a damaged pull tab. However, if the zipper separates after the pulltab, there are some damaged teeth, or the slider has a bit too much wear, this might require an more complicated repair.
Good maintenance habits are also very important. Just cleaning them regularly, not being too hard, a bit of oil from time to time. All of these practices help zippers avoid future breakage on jackets, bags, suitcases, tents, shoes, and an almost infinite variety of other products.
Whether you’re repairing outdoor gear before a trip, fixing a favorite jacket, or extending the life of a suitcase, understanding how to fix broken zipper pull issues gives you a practical DIY skill that can keep your belongings functioning for years.
Frequently Asked Questions
1. Can I fix a broken zipper pull without replacing the entire zipper?
Yes. In most cases, only the pull tab needs to be replaced. If the slider and zipper teeth are still in good condition, installing a new pull is a quick and inexpensive repair.
2. What is the easiest temporary replacement for a broken zipper pull?
A small key ring or zip tie is one of the simplest temporary solutions. Both are durable, easy to install, and allow the zipper to function normally until you can fit a permanent replacement.
3. How do I know if the slider is damaged instead of the pull?
If the zipper separates after being zipped, feels loose, or won’t keep the teeth together even with a new pull tab, the slider is likely worn and should be replaced.
4. Can I glue a broken zipper pull back together?
Use of Glue is Not Encouraged Most adhesives can’t hold up for long due to the repetitive use of pull tab that would cause a great force while pulling the string. Re-attaching a new pull tab is the most practical and effective solution.
5. Are universal zipper pulls compatible with all zippers?
Numerous zipper pulls are manufactured in “universal” sizes and may suit many zippers, but you’ll need to consider if your zipper’s slider shape matches. Check your current zipper slider before buying to confirm a proper fit.
6. Why does my zipper still stick after replacing the pull?
If the slider sticks (this doesn’t mean the zipper itself is broken, just that the slider is not moving up or down freely) it is likely because of a dirty zipper, clothing or other fabric stuck inside the slider, rust, or the slider itself has become old and corroded. Try cleaning the zipper with a little soapy water, applying some lubricant to the slider and zipper, or if the zipper’s slider is corroded, it may need to be replaced entirely.
7. When should I replace the entire zipper instead of repairing it?
Total replacement is usually recommended when there are 2-3 missing teeth, the tape has completely separated from the fabric, or the slider is extremely worn and has been chewing up teeth.